Table Of Content
Remember that the hair generally is exposed to light until it overlaps with other clumps of hair. These are the moments when our strokes become harder. To follow this tutorial, you'll need some kind of head base.
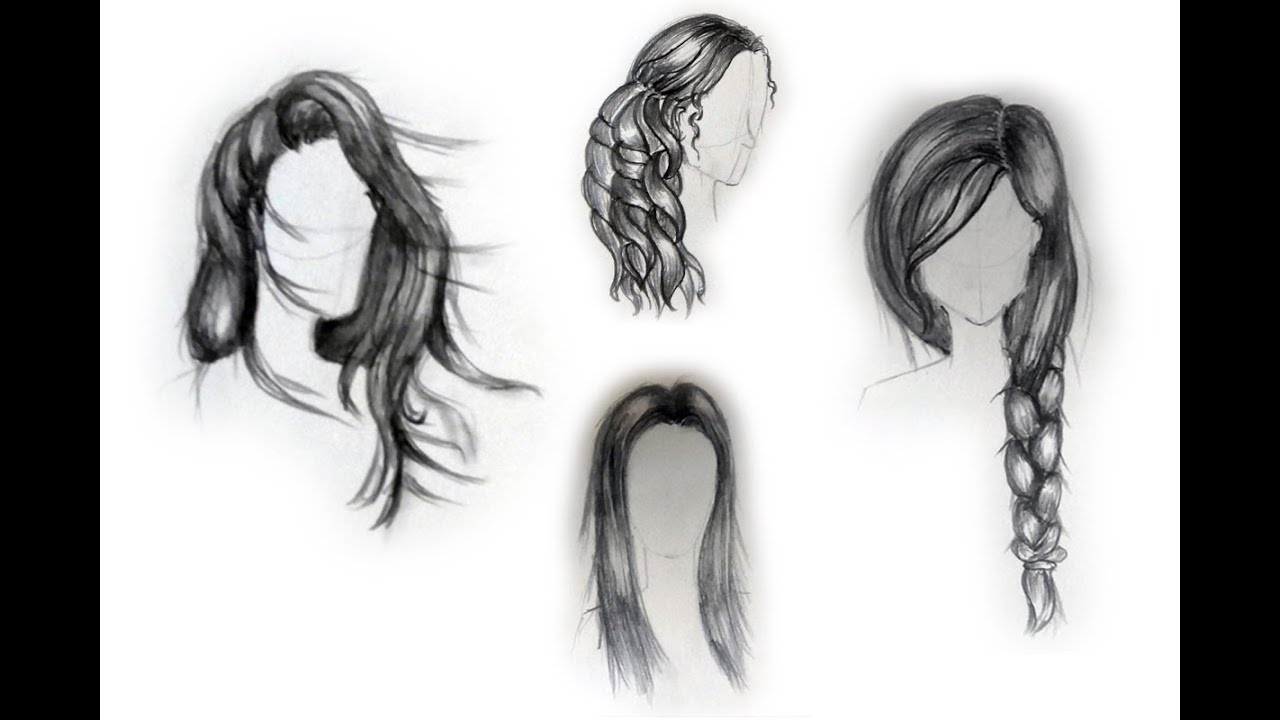
How to Draw Hair
Shade the hair now, thinking in terms of strands, not single hairs. Outline the whole hair, following the rhythm of strands. Don't press too hard—hair is soft and shouldn't have a hard outline.
Step 16
For example,about halfway down the hair on the left, light illuminates all threesections of hair. Notice that while theyall look ribbon-like, they are not repetitive and each has a uniqueshape and curve of its own. Mostoften I suggest to draw all block ins using straight lines. However, inthis case I am drawing the hair almost exclusively with curved linesbecause I want to achieve a feeling of "flowing" hair right from thebeginning of the drawing. When learning how to draw hair, one way to reinforce this flow andinterconnectedness while improving the accuracy of your drawing is tolook for gestures.
How to Draw a Skeleton Hand – Creepy Bone Hand Drawing Steps
Afterward, it is time to fill in the hair with more texture, so add long and short lines throughout the hairstyle. Finally, when you've fleshed out your sketch enough, it is time to go over it in ink. So, using your pen of choice (we recommend a technical pen, like Sakura Pigma Microns), slowly go over the lines.
I’d recommend researching and practicing as much as possible. Finally, I added some strands which move in completely different directions than the original one, to balance the drawing composition and make it more attractive. Let’s keep in mind that there is always space between strands and over layers of hair, which builds up to create volume. I might change my mind later on, but this stage allows me to see my hair ideas more clearly.
How to Draw Hair: A Comprehensive Guide for Artists
Hair locks must somehow wrap the head following the curves of its surface. Both circles have a layer around them, but A looks more like a flat shape, whereas B looks to be more spherical. Matthew Matthysen is an educated multidisciplinary artist and illustrator. He successfully completed his art degree at the University of Witwatersrand in South Africa, majoring in art history and contemporary drawing. The focus of his thesis was to explore the philosophical implications of the macro and micro-universe on the human experience. Matthew uses diverse media, such as written and hands-on components, to explore various approaches that are on the border between philosophy and science.
Step One: Sketch the hairline
Darlene created RFA In 2013 with the goal of sharing simple yet detailed drawing tutorials with other artists on the world wide web. She is a self taught pencil portrait artist and Youtuber. But a change in your approach can help you leave those fears behind. In this tutorial, I will introduce 4 simple steps for drawing realistic looking hair. Drawing hair can be a challenging yet rewarding endeavor for artists. With a solid understanding of hair anatomy, observation skills, and the right techniques, you can create stunning and realistic hair in your drawings.
As I continue drawing I look for "ribbons" of hair to indicate, usually with a highlight and halftone. Throughout this drawing I will be looking for shapes, beginning withgeneral ones and moving towards more and more specific ones. I discuss how to use shape to create a likeness of your subject and present a shape exercise in Lesson 2 of my free Mini-Course. This will help you achieve realistic curls with plenty of volume. When creating your first layer of pencil strokes, mix it up with a variety of different line weights. I use a mixture of dull and sharpened pencils as well as mechanical pencils.
Learn Art Online
I am using my kneaded eraser just as much as I use my pencil throughout this drawing. It's a fantastic tool for drawing hair because it can be used to pick out specific details, or to lighten larger areas of value. Watch this video tutorial on my three favorite kneaded eraser techniques for realistic drawing here. It helps to make loose outlines of the skull before you start drawing hair.
As is the case with any subject that you draw, practice is important. The more that we practice with a particular subject, the better we understand it. Drawing a whole head of hair will give you lots of practice. However for some, the thought of doing this may be intimidating.
Lure of Lycra, wild hair and 'flashmanship' draw Will Ferrell and Jon Heder to comedy about ice skating - Oklahoman.com
Lure of Lycra, wild hair and 'flashmanship' draw Will Ferrell and Jon Heder to comedy about ice skating.
Posted: Fri, 30 Mar 2007 07:00:00 GMT [source]
You don’t have to follow all the steps, as I believe there are a few steps that you think are unnecessary or lacking. Therefore, filter and improvise this tutorial, or any tutorials you find. Whether your style is the simple one, or the extravagant one… just ADJUST to your tastes, your way, your brush, and your style. But if you have all the answers to the two steps you just passed or, perhaps, skimmed, then what you have to do is to follow the steps below. Don't be afraid to work the values to increase the contrast. Adjust darker tones by adding additional applications of graphite and make areas lighter with your eraser.

Hair strands naturally collect and create a form (which is what I am referring to as a "clump"). This action of light strokes with a gentle hand is the aim of the shading process done with a pen. When learning how to draw realistic hair with a pen it is essential to understand the various pressures applied to the pen for various tones. Light hand for lighter tones and more pressure for darker strokes.
However, that motion can change which is what we see in curly hair. Depending on what kind of hair you want to draw, you want to observe that particular kind of hair in real life. What you will notice is that the real hair is a series of lines that are clumped together and when overlapping creates shadowing. The aim is to draw a series of lines in segments that can be divided by the moments of overlap in the hair. We draw the overlap by shading in these areas which are produced from a line that generally runs through a series of lines going in a single direction.
The shaft is the visible part of the hair, while the root is the part embedded in the skin. The follicle is the structure that surrounds the root and nourishes the hair. First, you add new layer and choose the blending mode you prefer. And in this video, I do the line art immediately, with the overall shape as my guide. Then we'll use directional stroking to develop the texture and the range of value. For each layer of graphite that we apply, we'll use a blending stump to work the medium into the tooth or texture of the paper.
You can add more or less detail depending on the level of realism you are trying to achieve. Click here to learn more about light and how to shade. Each tool has its own unique qualities and can bring out different aspects of hair, allowing you to explore different styles and achieve diverse results. While observing real-life references is crucial, developing the ability to draw hair from imagination is equally important.


No comments:
Post a Comment